Monday, July 30, 2012

The Unexciting Part

I've been pretty bad about taking pictures for the blog over the last few days.  I think it's because we've hit a point where we're chipping away at large projects bit by bit, but we don't have any really exciting progress to show for it.  It's a somewhat discouraging place to be in, but I just keep telling myself that we're making progress every day, whether it feels like it or not.

The big problem is that doing the kitchen cabinets is a project with lots of steps.  We started by cleaning grime, then using wood filler on the old holes, then sanding, then priming, then sanding again, then paint...you get the idea.  Right now, all of the different parts of the cabinets are in different stages of the process.  The doors are primed and ready to paint, the drawers are filled and ready to sand, the cabinet bases are all sanded but only half primed...argh!

Mmm...power tools.
The doors feel like the biggest part of the project, because there are just so many of them.  I never thought I'd complain about having too much kitchen storage but...jeez!

Look at all those doors...just waiting to be primed!
The good news is that even just getting the primer on them made them look much cleaner and newer.  I'm very excited to put that first coat of paint on.

Starting the priming process...
I spent way too much of yesterday on that step stool with a paint brush in hand.  Note the Dr. Pepper on top of the fridge to keep me going.  But look at how much awesomer a little bit of primer makes things...

Top shelf: primed; bottom shelf: not.
That is why I love painting!  So satisfying.  Bye bye nasty yellowed cabinets, hello clean fresh white.

On a side note, Sean has been meeting some of the neighbors and making friends.  I haven't been meeting neighbors because I've been too busy standing on step stools and priming.  Not that Sean isn't working, too...he's just been running a lot of errands here and there so he's out of the house more.  And he's more social than I am.

Anyway, I digress.  The point is, our neighbor works for Hormel, so look at the awesome house warming gift (read: free samples) he gave us!

Nom.
These things have been the best snacks EVER!  And at least they're not Spam.  Hormel, you had me at pepperoni.

Tomorrow we take the day off so I can get a show open, and then Wednesday I'm hoping to finally bust out the paint and put the first coat on the doors.  I am stressed out about the white paint color I chose.  My head told me (after reading too many internet message boards) that I should go with a creamier, more vintage-y white, but my heart said it was too much contrast with the current trim color and I needed something brighter white (we're going to be painting trim bit by bit as we go, so I wanted something close to the current color so it didn't look too out of place).  I ended up deciding on Alabaster by Sherwin-Williams.  Fingers crossed.

Thursday, July 26, 2012

If you can't stand the heat...

Another Wednesday, another day making over our house...

We decided to pause on the master bedroom (as now all it needs is primer and paint, which will be a piece of cake...and we haven't picked out a paint color yet), so the next big project that we thought should be tackled before we move in is the kitchen.  If you remember from our earlier posts, our kitchen has great bones and is the largest kitchen we've ever had.  However, it's in need of some serious love and rehab.  For starters, the grime is pretty impressive:

White cabinets don't ever need to be washed, do they?
This made me wonder about two things.

First, who LIVES with that much dirt in their kitchen?  I'll be the first to admit that our house is far from perfectly clean, but if I notice that the cabinets have a few splashes of yesterday's dinner on them, I grab a paper towel and some 409 and wipe 'em down.  I can't believe that someone would see all that dirt on their cabinets and actually be OK with it.

And second...this house sat on the market for over a year.  At no point did the sellers or the REALTOR think that, hmm, maybe if we brought in Molly Maids and scrubbed down the cabinets we'd have a better chance of unloading this place?  No, they just dropped the price by $50k instead.

Whatever, their loss, our gain.  And we will not live with grimy cabinets!

My iPhone photos don't even do it justice:

Just...ew.

But, before we tackled the grime there were some cosmetic issues we needed to deal with.  Let's start with the mini TV right next to the sink:

Must...be...entertained...at...all...times...

Both Sean and I have issues with people who need to have a TV in every single room in their house.  Don't get me wrong, we LOVE our TV.  But we only have one.  And when we want to watch it, we go to the living room and watch it.  We don't have a TV in our bedroom, or in any other room in the house, and we certainly don't need one in the kitchen. (We do weird things in bed instead of watching TV...like reading books.  Crazy, I know.)

Luckily, the TV-ectomy was an easy procedure.  A few screws and poof!  Bye bye.

Oh yay...more grime...
Next issue: contact paper.  I hate contact paper.  I'm sure that some people have their reasons for using it, but I think it's dirty and gross and I hate the way it looks.  And the entire kitchen was lined in contact paper.  So away it all went.

See all that dirt trapped around the edges?  *shudder*
We even had a mini-archaeological dig and found ancient contact paper circa the 1950s trapped under chipped paint:

Yuck.
Finally, with contact paper removed, it was time for me to play with my new toy.  I think I literally squealed when we bought this thing at Home Depot.  Blame the theatre techie in me...I love power drills.
So beautiful.
A brief aside to discuss design: Sean and I want to restore the house from "busted 80s" to "classic 1930s," while still making it feel modern and on trend.  I read 
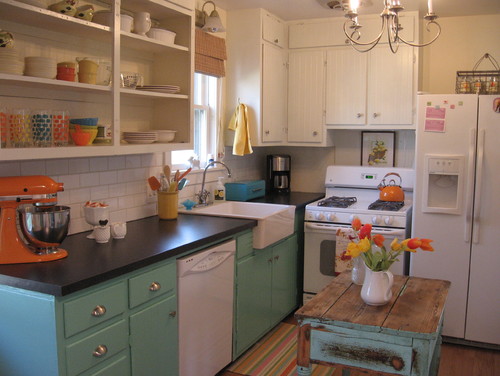
This Old House pretty obsessively, and one trend I've been seeing a lot of lately is open cabinetry. Like this design (courtesy Houzz) that has some nice elements:


I like this look a lot, but let's be honest: it means we have to actually keep the inside of those cabinets looking neat, and things will get dirty much more easily. 

Instead, I had the idea to just remove several of the upper cabinet doors, which we could fill with decorative accents.  That way we get the neat, trendy look, but we can keep it looking nice much more easily.

Just to test out the theory, I took those doors off first to get a hint of what it will look like:

Ignore the mess on the counter.
So far, I think I like.

A little more time playing with my favorite power tool and I had all of the cabinet doors removed (and yes, I labeled everything carefully beforehand).

Thank you, Makita...this would have taken me all day if it wasn't for you.
Then came the REALLY fun part...scrubbing all that wonderful grime off every single cabinet door.  I didn't take any pictures of that part of the process, probably because my hands were covered in 409 and my fingers were too sore to press the shutter.  But it happened, and we now have a dining room full of clean kitchen cabinet doors drying:

So...much...whiter!
Tomorrow I continue by scrubbing grime off the frames, and then it'll be time for repairs and...wait for it...another brand new power tool!  (Be still, my beating heart.)

I have to say, I'm finding this process to be so incredibly satisfying.  Yes, it's been very hard work (and my hands look terrible...I feel like Scarlett O'Hara) but at the end of each day we can see our accomplishments and it feels really good.  I am unbelievably excited about how amazing this kitchen will look once we're done with it.  

Sean and I bought a drawer pull and knob at Home Depot to try out, and we liked them so we bought a full set plus hinges tonight.  I was pretty giddy purchasing those hinges.  No pictures yet...we gotta save some surprises for later!

To wrap things up, a shot of the beautiful sunset over the cornfields as we drove home last night.  Sweet Home Minnesota.


Tuesday, July 24, 2012

Can you please run to the store? I just ran out of elbow grease.

Well, day two and three of our wallpaper attack...we're back at it:

Here we go...
We spent most of day two finishing scraping off the upper four layers of wallpaper and paint.  Actually, I spent most of it doing that...Sean worked on getting our water softener set up, our dehumidifier working, and other various errands until I finally screamed at him that I couldn't handle scraping wallpaper by myself any more and could he PLEASE come and help.  So he did, and we were able to get all of the top layers off by the end of Saturday.  Which left removing the bottom layer for Sunday!

We started by scoring the entire room with a Paper Tiger (which I found floating around in the basement of our current rental--there's a few bucks saved!).  Then Sean would wet down sections with a spray bottle containing a vinegar/hot water solution we mixed up.  Wait a few minutes, then scrape away.  Most of it came down pretty easily, but there were a few sections that they must have put up with super glue. Those required some extra work.

You can't tell from this photo, but Sean is having SO much fun...
...see?
I followed behind Sean, doing the edging on the floorboards, crown molding and windows/doors.  

Everyone who might be reading this probably knows why the blog address is "spoxie," but for those who don't, here's the reason why:

Spaniel + Dachshund (Doxie) = Spoxie
Our little guy Brody came along with us to the house this weekend, and was very good...though he really wanted to watch and see what on earth we were doing.

After we got the bottom layer of wallpaper down, our mess looked something like this:


We still needed to clean the walls.  I used the vinegar/water solution again, but this time wiped the walls down with a sponge and scraped off any remaining glue.  It was pretty amazing how well it worked.

Left side: dirty, right bottom corner: clean!
Look at the difference!  

By the end of Sunday, I was running out of steam pretty quickly, but we were so close to finishing the room that we just powered through and got it done.  And voila...80 years of wallpaper gone!

Before...


...and after!
Move-in ready!
Seriously, it almost looked so nice (and we were so tired) that we briefly considered starting a new "bare plaster walls" trend and just keeping the room as-is.

But, of course, we won't do that.  Yesterday was the last day of a major 40% off paint at Sherwin-Williams sale, so I stocked up on massive amounts of primer, and a few colors for the downstairs.  We haven't chosen colors for the upstairs yet, but we will soon...I have ideas.

I should add that this project took us a total of three days (Friday-Sunday), but we weren't both working on it full-time for all three days.  We had to do other errands and take care of other house stuff during that time. I think if we had both been working on it non-stop, we could have done it in two.

I am hopeful that this is the worst of the wallpaper removal.  The bathroom and entryway both appear to be single-layer, and we already looked at the disaster that is the dining room...but that's a smaller room and there isn't a layer of paint to contend with as well, so it should go more quickly.  We also have a technique now, so we're able to move a lot faster.

A few days off to tend to our "real" jobs, and then tomorrow we'll dive back in...

Friday, July 20, 2012

Ignore that glisten on my brow...it's just sweat equity.

Well, it's finally here...we've returned from our vacation and the house awaits! Not even a travel cold was going to sideline us from getting started today.We had to run a few errands so we weren't able to put a full day in today, but we still made some huge progress. A general contractor came by in the morning to give us some quotes, so while Sean was talking to him I couldn't help but start doing what I've been itching to do since we first set foot in the house...peel wallpaper!

There it goes...
I had already started peeling a little corner in the entryway, so I let it rip...and voila!  Paper came off easily AND I could see the plaster wall underneath.  Only one layer?  Piece of cake!

Peeking through the dining room into the entryway...this is going to be a breeze. 
The previous homeowners had put white trim on the edges of some of the walls, presumably to protect the corners of the wallpaper.  I think it's awful, of course, so I carefully pried it back and found that the trim came off very easily.  Even better, it started taking off the wallpaper next door in the dining room...

Hmm...something not right here...
Oh...crap...
There were not one...not two...but FOUR layers of wallpaper in the dining room.  At least, that I could count.  Two of which were infinitely better than the current top layer...but anyway.  After a little more excavating, here's what was underneath:

Pretty...
In that photo, you can see the pretty gold and white wallpaper, as well as the bottom floral layer, which I'm guessing is original to the house.  Missing are the top two layers, something pretty that was blue and white and then the decidedly less pretty current stripes.

So, of course, I did what any sane person would do...I attacked.  A few minutes (hours?) later the small piece of wall in the dining room looked like this:

It's totally shabby chic, right?
I was feeling pretty proud of my work.  I used vinegar and warm water, and bought a really fabulous scraper at the local Ace hardware, and with some elbow grease I was on my way.  But then reality set in.  This was definitely going to take a lot longer than I thought.  And, with our moving date approaching, the dining room and entryway are not exactly the highest priority for wallpaper removal right now.  After a consultation with Sean, we decided it would make more sense to work on the master bedroom so we can get that ready for move in first.  The entryway and dining room we could easily work on after we move our stuff in.

So, upstairs we went...again, I'd already pulled back a little of this wallpaper and it looked like only one layer, easy breezy...

...beautiful Cover Girl?
Just kidding!  How about another four layers of wallpaper?  Only this time, let's throw a layer of PAINT in there as well!  

As best as I can tell, the layers in this room go something like:
  • Top: Beige stripey wallpaper
  • Blue and green stripey wallpaper
  • Baby blue paint
  • Hot pink floral wallpaper (not seen in above photo, the paint adhered pretty well to it so we only got a glimpse now and then)
  • Bottom: Original blue and pink stripey wallpaper

This was going to require some extra equipment, so after a second trip to Ace, we were outfitted like this:

I...can't...breathe...
The good news was that everything above the bottom layer was coming off VERY easily...almost too easily in some places.  We were able to just peel most of it off by hand and then attack the tough parts with the scraper.  So we decided to just get rid of the top four layers first, and then we'll go back and score/wet/remove the bottom layer afterwards.

Attack!
I even got Sean to help with the peeling...heh heh heh.

You can run, but you can't hide.


The original wallpaper underneath is actually kind of cool, and because the very top layer of it was coming off as we peeled, it ended up with sort of a neat, textured look:

Of course, not SO neat that we'd want to keep it or anything.
The house was built in the 1930s, so it was kind of fun to do a little archaeological dig and see a glimpse of what the house might have looked like when it was first built.

We finally had to stop, as it was getting late and we'd run out of tarp.  I made a huge mistake in only picking up two tarps at Ace.  We're going to need about 35 of them.  But, we did manage to get one side of the room pretty well stripped!

Check out the wallpaper carnage on the floor.


And tomorrow, we shall attempt to finish the rest.

We learned two other exciting things today at the house.  First...we don't have vermiculite in the attic!  We were worried that we did (because it can be contaminated with asbestos), but the contractor pointed out that no, it's actually something else that I guess can look sort of like vermiculite when you're far away and can't see it very well.  So we're not going to die of lung cancer...yay us.

Second, our windows are double hung, which is super cool.

Tomorrow, we continue on the quest towards a wallpaper-free home...

(Side note: the photos for this post were taken with my iPhone, hence the smaller size/lower resolution.  I'll probably keep taking in-progress photos with my phone since it's dusty, dirty work and I don't want to destroy our good camera.  I'll save the Canon for the finished "after" shots.)

Tuesday, July 10, 2012

It's official...

No pictures this time, just a quick note to say that we finally CLOSED and the house is officially ours! Of course nothing could go smoothly, so the banks kept us waiting for 8 hours on pins and needles today. We were supposed to sign all the paperwork at 10 am and finally got bank approval at 6 pm. It's all said and done now, though. We already had a contractor over to the house today to start drawing up estimates for things on our list! We're off on vacation for a week and then we'll dive right in. Hopefully the next batch of pictures will be work-in-progress!

Saturday, July 7, 2012

Highs and Lows

Well, as we approach our final closing date on the house, I think it makes sense to wrap up the home tour.  These are the last of the "before" photos!  After we close on Tuesday (fingers crossed), and then take a brief vacation, we'll start tearing this place apart.

In the meantime, here are the last of the photos.  First stop, the attic:

Look, it's an attic.
Not a whole lot to see or do here.  It's unfinished and not a very usable space with the A/C unit and all of the vents, so we'll probably just leave it be.  We could potentially try to move stuff around and finish it down the road, but that would probably be expensive...it's last on our list.

The basement has a little bit more to see:
Just what I wanted...more wallpaper! (The cabinet thing isn't ours and hopefully will be gone before we move in.)
This is the main room when you come down the stairs into the basement.  It's finished, with ceiling, carpet, and...oh yes...wallpaper.  It's a decent-sized room, and while I wouldn't want to make it a bedroom or anything, it could be usable as a game room or craft workshop.  Honestly, the basement is pretty low on our priority list, so we'll probably just use it as storage and laundry for a while, but it has potential to be fixed up.

I would take down the wallpaper in this room and paint.  The wall on the right side of the photo is all wood, and it isn't particularly nice looking, so I think painting it white would brighten things up considerably.  There are quite a few built-in shelves down here, which will be nice for storage.

Blurry picture of the storage room.
 Off to one side of the main room is a little room that would be perfect for a home workshop and storage.  I'm hoping to fill this up with POWER TOOLS!

These are just screaming, "Please, Lindsey...paaaaaaaint meeeeeee..."
 Then, on the other side is the laundry room.  Look at the fabulous built-in shelves!  Again, they need some white paint to brighten things up, but this will be awesome storage.  The laundry chute also spits out into this wall unit (have I mentioned how excited I am to have a laundry chute?  I really truly am).

The washer on the right is saying hi to you.
 I am still not over the joy of having a washer and dryer in my own house that does not require the use of quarters.  I don't know if I'll ever get over that.

To the right you can see the water softener, which is old and will need to be replaced.

And then there's this...
 While looking at houses, we saw a LOT of houses with bathrooms in the basement.  I'm not really clear on why this is such a trend in Minnesota.  We saw more than one house that ONLY had a shower in the basement, and they weren't even nice showers.  But, seeing as we're currently living with only one bathroom, just the fact that we have a second toilet is a bonus.

Here's the inside of the bathroom...surprising cute for a bathroom kind of shoved into a corner of a basement.
Fixing this up isn't going to be a huge priority, but I will probably splash some paint down there eventually and hang a shower curtain and attempt to make this part of the basement look presentable.

The floor is a laminate that, while not exactly stylish, is livable for now.  The toilet has also been replaced since these photos were taken.

If all continues as planned, in three days time we'll have a key and be on our way...to a vacation out of state, but THEN we will return and start the attack.  We already have some contractors scheduled to give us quotes, and I think the first thing I'm going to do is start tearing down wallpaper.  From there...who knows.